For all intents and purposes, the original Xbox, with its NVIDIA GPU, 8-10GB hard disk and custom Pentium III processor was a high-end PC for its time -- albeit, one that connected to a television. What Microsoft didn't realize back then, though, was that when you put that kind of hardware in the hands of hackers and enthusiasts, it's only a matter of time before people start doing more than just playing
Halo. Fast forward to 2003, the year the Xbox Media Center was born. Nowadays, it's simply referred to as
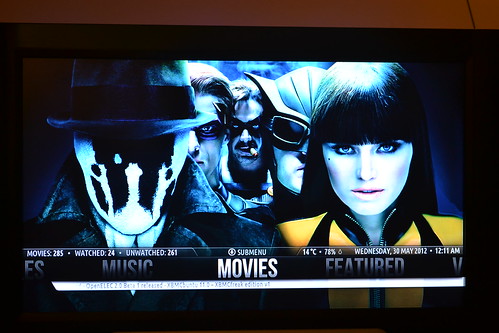
XBMC, since it runs on more than just your Xbox. In brief, XBMC is an open-source software solution that enables a plethora of media streaming capabilities on all sorts of devices. What once was limited to the original Xbox, can now be put to use on everything from a bare-bones Linux desktop to an Apple TV. In this how-to, we'll show you how to build a simple XBMC setup using XBMCbuntu. Catch us after the break for the full step-by-step.
Getting started
First, let's talk a little bit about what XBMC is and what it does. First off, XBMC itself is not an operating system; it's what your IT guy would affectionately call a "pluggable application stack." XBMC is a media-handling application whose default feature set can be extended via plugins or add-ons. As for the "what can XBMC do?" part, well, in its simplest form, it can stream your movies, music and pictures to that sweet flatscreen TV you wish you had. Sure, there are a plethora of platforms out there that manage your media, but XBMC allows folks to do this on commodity hardware that may just be chillin' in your attic.
While pushing files to your flatscreen TV is XBMC's primary focus, it can do much more than that. For example, one of its greatest features is its media extender capabilities. XBMC receives AirPlay content, supports UPnP, allows for TV watching and lets you play all of those NES ROMs you've accumulated.You can browse all of the available extras via the add-ons browser in the XBMC settings. While we can't cover everything that XBMC does here, we can get you to the point where you're off on your own, even if you only ever install a lyrics plugin to make a karaoke box.
So without further ado, let's get started.
To get XBMC up and running we're going to be using XBMCbuntu, which is basically Ubuntu with XBMC pre-installed as the default GUI. It's one of the quickest ways to get up and running with XBMC if you don't already have a Linux box lying around. Right off the bat, you're obviously going to need some hardware on which to install XBMCbuntu. You could also use XBMCbuntu in a virtual machine, but keep in mind you'll more than likely need to hook this thing up to a TV. Of course, there's a glut of laptops out there with HDMI that would do just fine as well. Anyway, it's Ubuntu-based so you can install this on pretty much any x86 hardware you can muster.
Our basic recommendations are:
- One dual-core x86 processor (two cores are required to decode H.264 video in 1080p).
- One GPU (this writer has a sweet spot for NVIDIA GPUs).
- At least 1GB of memory. As is often the case, more RAM is better.
Got all that? Good. Here's what you do next:
Grab a fresh ISO image from the
xbmc.org homepage
here. Burn that bad boy to a CD-ROM (
Yes, a CD, not DVD; it's only 653MB). Insert the CD-ROM and boot into the installer. After a few moments you should see the first screen on our journey to open source media streaming:
After a while you'll get to your first prompt of the XBMCbuntu installer. You'll want to click "Install Ubuntu" (natch).
Next up you'll see a quick disclaimer about "best result" recommendations, as well as an option to download updates during install. Check that box and click "Continue."
The installer will now ask if you want to erase and use the entire disk. You do indeed want to do this. Make sure the first option, "Erase disk and install Ubuntu," is selected and click "Continue."
XBMCbuntu then lets us know which disk it's going to destroy data on and install Ubuntu. Your setup should look similar; if it does, go ahead and click "Install Now."
You'll notice after you click "Install Now" that a progress bar has appeared. Get ready for a new barrage of post-setup questions while the installer is writing to the disk.
Our first post-setup question: what timezone are you in? Make your selection and click "Continue."
The next question asks which keyboard layout you prefer. We'll let you be the judge, though you can't go wrong by sticking with what's familiar.
Here's where things got a bit dicey for us. Once we got to this next set of questions, we found a glitch, wherein if you enter your name and then attempt to change the hostname, the installer will complain that the hostname exists on the network:
Basically, the installer thinks our sample hostname "noitdoesnt" is already in use on the network. To fix this, simply go back and retype your name in the first input box. Once you do that, all will go green. Said differently, we suggest entering your desired hostname first to avoid this issue.
Finally, we're done answering questions. Now sit back and read the onscreen info while you wait for the installation to wrap up.
Alright, almost done. Click "Restart now" when prompted.
Lastly, we'll see a text prompt informing us to ensure our XBMCbuntu installation media is removed from the drive and to press "Enter" once we confirm this.
Now what?
Once you've pressed that "Enter" key and the system reboots, congratulations! You should now find yourself in the XBMC interface. Simple enough, right? Now that you've completed the install, let's add some media files and get an add-on or two set up.
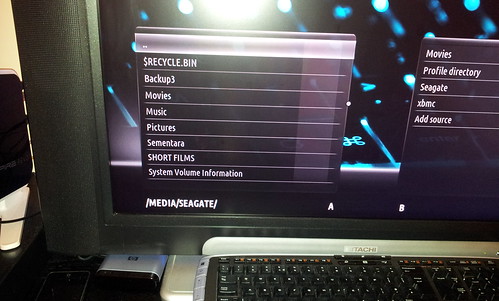
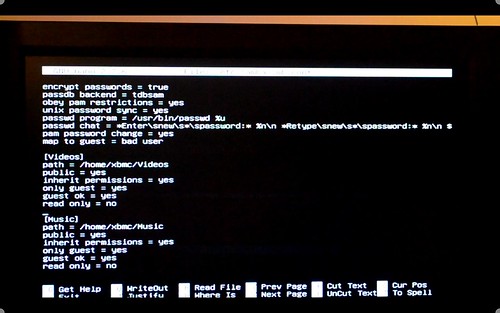
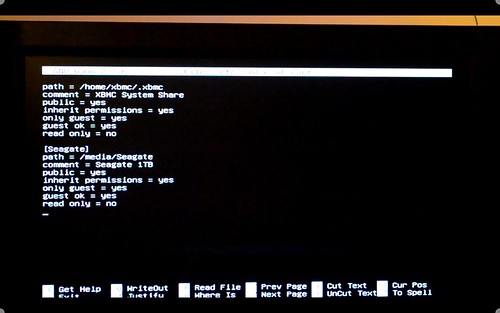
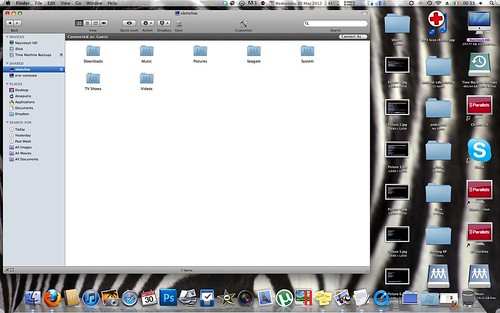
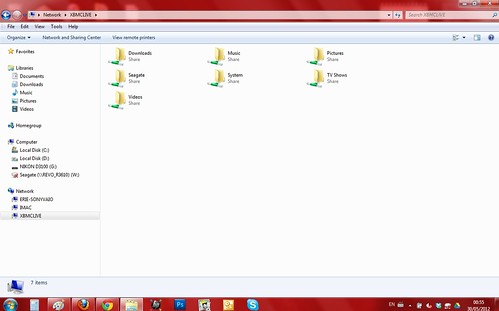
First things first, let's get all of your media files to XBMC. We can do this via a number of ways, but the most generic option is to use an SFTP client. Since odds are you're going to be copying multiple directories, we recommend you use a program like FileZilla to make it easier. There are multiple choices, of course, but we prefer FileZilla because it's simple to use, works on different platforms, supports SFTP and can copy multiple folders at once.
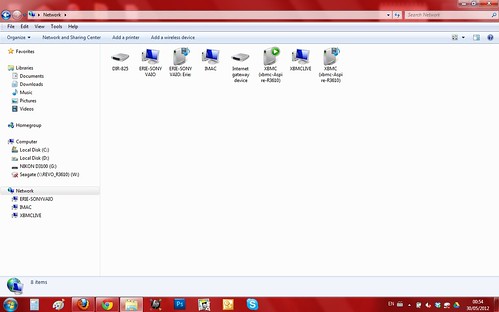
Next: grab the IP you need from "System Info" under the "System" tab.
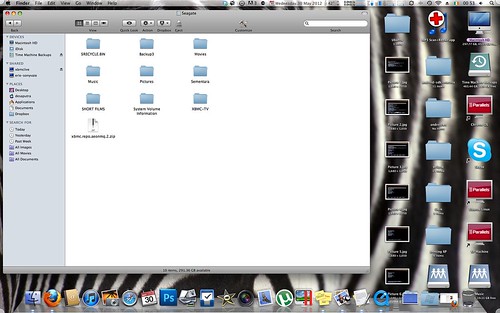
Now that you have that, open up a connection with FileZilla (Mac version shown). Enter your IP, the login name you chose during XBMC install and the password. For the port, enter "22."
Now, we just drag and drop to "Music" on the right. Remember that you can organize your folders however you like.
You should do this for all of the media you want to have available. Your stuff should begin showing up immediately; for the sake of this demo, let's start playing some music you legally own.
In the XBMC bar, navigate over to "Music" and select "Files." You'll notice your tunes are organized by artist, album and song. Highlight whatever track you like and press "Enter." Enjoy that sweet sound while we continue more post-configuration joy.
By the by, take note if you're playing music you purchased on iTunes: it should be playing flawlessly, no tweaks necessary.
Let's walk through the process of adding a video add-on. And really, why not use Engadget's (written by user divingmule) as an example? First, navigate in the XBMC bar to "Videos," select "Add-ons" and press that "Enter" button. Then hit "Get more" and you'll see a boatload of other add-ons; select Engadget's (okay, okay, or whatever you want) and press "Enter" again.
A new dialog should pop up now. Just do as your common sense tells you and click "Install."
After a few moments, you should now see "Enabled" beside the freshly installed plug-in. If you navigate backward you should see Engadget sitting where it belongs in the "Videos" section.
Now, you can watch an episode of "The Engadget Show," if you've got an hour to spare.
But wait, there's more! Let's get some gaming going. Say, hypothetically speaking, that you're in a country where making backups of video game ROMs is completely legal, and you have all of your Nintendo Entertainment System cartridges backed up on your computer. Well, for starters, we need to install an emulator to play those legally backed-up ROM files.
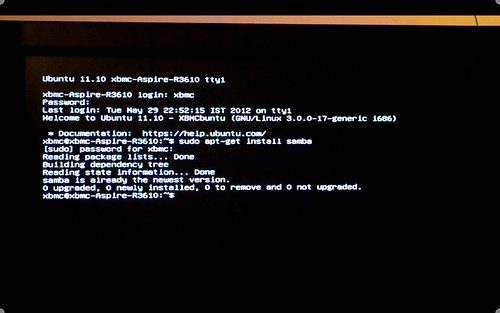
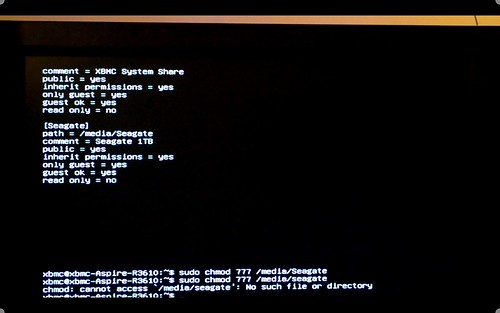
First, take three of your fingers and press "ALT / CTRL / F1" together, which should now show a black screen with text that says "Login." Enter the same credentials you used during installation and the SFTP process. You should now see something like the following prompt:
Type: "sudo apt-get install fceu".
For those readers out there that recognize this, yes, this is "apt-get." XBMCBuntu is a full-fledged Ubuntu distro, so most anything you would install on vanilla Ubuntu is fair game here. Take that tidbit and run with it.
Next, type "exit" then press "ALT / CTRL / F7" together to get back to the XBMC GUI. Navigate over to "Programs" and, just like with the installation of Engadget video, click "Add-ons" followed by "Get more."
What you want to choose here is the "ROM Collection Browser" option. Once the installation is complete, you'll once again see an "enabled" label confirming the setup went as expected. Navigate back to "Programs" and you'll see "Rom Collection Browser" listed. Press "Enter" on that, as we've still got a bit of configuration left to do.
Select "Scrape game info and artwork online."
Then choose "NES" in the following dialog.
XBMC wants to know where the fceu emulator we just installed is located within the system. Navigate to Root filesystem > usr > games > fceu.
Once selected, a new dialog will open asking for params. We do not need to modify anything in this window, so simply hit "Enter." Next up, we need to specify where those legal ROM backups are located. Choose the path where you SFTP'd them to. Once the appropriate path is selected, you need to select a file mask; in most cases it's probably a .zip file. Press "Done" and the ROM setup should be complete.
Next, you'll be asked where your NES artwork will be stored. Just select "OK" here, as the default option is fine. Lastly, the add-on will kindly ask if you'd like to add another ROM collection. You can safely select "No" at this point. At the next dialog, select "Import" to complete the process.
Work complete! You can now select a ROM and play it on your big screen.
At last, you're done with dialog boxes and settings tweaks for the time being; feel free to reward yourself with a little nostalgia trip, though we think you
might want to grab
something better than a keyboard. Wrapping this journey up, these post-configuration tips barely scratch the surface of the truly magical things you can do with XBMC. Keep tinkering and see just what's possible. There's no reason to hold back your geeky side -- after all, haven't you already built own media center device
"